From Spare Parts to Smart Systems
Published on September 24, 2025 by Claudio Cabete
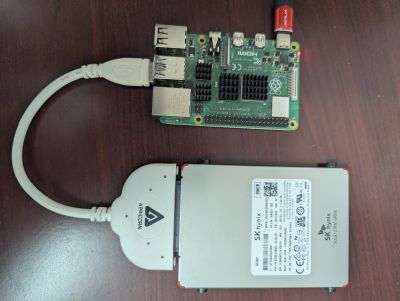
It started with a spare Raspberry Pi 4 Model B and a 256GB SSD.
No grand plan. Just a quiet itch to build something meaningful—local-first, privacy-respecting, and fully under my control. I didn’t know I was building Homatica yet. I just knew I wanted to experiment.
And it all began with a simple question I asked Grok:
"I have a Raspberry Pi 4 Model B. What is the best OS to install so I can run an MQTT broker, Python, and other cool utilities for home automation?"
That one prompt kicked off everything.
Grok didn’t just answer—it guided me through choosing Raspberry Pi OS Lite, installing Docker, and setting up Home Assistant with a single command. It helped me think through architecture, not just syntax. And it kept me moving forward, even when I didn’t know what the next step was.
What followed was a months-long journey of iterative setup, troubleshooting, and refinement. But here’s the kicker: with the help of AI tools like Copilot and Grok, I got 90% of the core environment up and running in just three days.
That includes:
- ✅ OS install and SSD tuning
- ✅ MariaDB setup and schema design
- ✅ Python virtual environment and dependency scaffolding
- ✅ Docker install and container orchestration
- ✅ Mosquitto MQTT broker in Docker
- ✅ Home Assistant container with persistent volumes
- ✅ FastAPI backend with templated pages
- ✅ First working API service
AI didn’t build it for me. But it helped me think faster, debug smarter, and stay focused on the right order of operations.
🧱 Step 1: Define the Foundation (Linux + SSD)
I chose Raspberry Pi OS Lite for its lean footprint and compatibility. AI helped me:
- Compare ext4 vs btrfs for SSD wear leveling
- Tune
fstrimandhdparmsettings for longevity - Script a post-install checklist for SSH, locale, and swap
This was my first lesson: AI can’t build your system, but it can help you ask smarter questions.
🗃️ Step 2: Database First (MariaDB)
Everything else—FastAPI, Home Assistant, MQTT—would eventually need persistent storage. I used AI to:
- Compare MariaDB vs PostgreSQL for embedded use
- Generate a secure
my.cnfconfig with slow query logging - Design a schema for automation logs and sensor data
🐍 Step 3: Python Environment
Python is my glue language. AI helped me:
- Create a virtualenv structure with clear naming
- Draft a
requirements.txtfor FastAPI, SQLAlchemy, and paho-mqtt - Write a startup script that logs version info and errors
🐳 Step 4: Docker Setup
I didn’t write a docker-compose.yml—at least not at first.
Grok handed me a one-liner for each service that pulled the image, configured ports and volumes, and set it to auto-start with --restart unless-stopped. It was fast, clean, and surprisingly effective.
Here’s what I ended up running:
homeassistant/home-assistant:stablefor smart home orchestrationeclipse-mosquittofor MQTT messagingportainer/portainer-cefor visual container management
Portainer was a bonus suggestion—giving me a dashboard to monitor containers, restart services, and inspect logs without touching the terminal.
AI didn’t just help me write config files. It helped me skip them when I didn’t need them.
📡 Step 5: MQTT (Mosquitto Docker)
Mosquitto handles lightweight messaging. AI helped me:
- Harden the config with anonymous access disabled
- Set up bridge mode for external brokers
- Debug retained messages and QoS mismatches
🏠 Step 6: Home Assistant (Docker)
I didn’t write a docker-compose.yml for Home Assistant. Grok handed me a one-liner that did everything:
sudo docker run -d --name homeassistant --restart=unless-stopped -v /home/pi/homeassistant:/config -p 8123:8123 homeassistant/home-assistant:latest
That single command:
- Pulled the latest stable image
- Mapped my config directory to
/home/pi/homeassistant - Exposed port 8123 for browser access
- Set the container to auto-restart on boot or crash
Within minutes, I was accessing Home Assistant at http://<Pi’s-IP>:8123 and walking through the setup wizard. No YAML. No orchestration. Just a clean launch.
AI didn’t just help me configure—it helped me skip configuration entirely when it wasn’t needed.
🌐 Step 7: FastAPI + First API Service
I built the Homatica backend using FastAPI. AI helped me:
- Design REST endpoints with clear naming and error handling
- Integrate Jinja2 for templated pages
🧠 Final Thoughts: AI as a Coding Companion
Copilot and Grok didn’t build Homatica. I did.
But they helped me move fast—90% of the core stack in just three days. They helped me think through architecture, debug edge cases, and document my process. They reminded me that the order of operations matters. That architecture is a conversation. That even a spare Pi and SSD can become something extraordinary—with the right questions.
And when it comes to coding, here’s what I’ve learned: AI is a brilliant assistant, but it still needs a human to lead the dance. Complex projects must be broken down into smaller, well-defined tasks—each one a stepping stone that AI can help shape, refine, and generate. The modules don’t stitch themselves together. That’s still our job: to orchestrate, integrate, and make the whole greater than the sum of its parts.
But I believe that will change. As AI continues to evolve, it won’t just assist—it will architect. One day, we’ll describe a vision, and AI will build it end-to-end, weaving logic, design, and deployment into a seamless whole. We’re not there yet. But Homatica is proof that we’re getting closer.